
Hey! So i will be cosplaying d.va soon, and that's why i'm making her headset and gun. I wanted to make a walkthrough/tutorial for this/how NOT to make the gun post for you guys!
DVA HEADSET TUTORIAL HERE
DVA HEADSET TUTORIAL HERE
Thanks so much to Zentaizone for sponsoring my D.va suit and make sure to check out their great zentai suits! Review will be coming up very soon!
So i am quite a cheap person/typical asian, so i racked my brain trying to find ways to make this gun using the cheapest material possible.. Mind you, this gun cost me less than $10. LESS THAN $10. I bought most of the materials and the only thing that i didn't buy was the necklace that i used for the keychain part. (which i received as a gift, yes i cut up a necklace that was a gift.. :')) and the worst thing is that right after i cut it up, i found a cheap necklace lying around.. sigh)
Also this a relatively simple tutorial as you don't need super fancy tools, like a dremel. But of course the dremel can bring the gun to another level so use it if you'd like! Just make sure to use a thicker foam so you don't accidentally drill through the foam.
So i first made a base of the gun using those project boards that have like insulation foam inside. I bought one from the dollar store. (cheap asian cough) I don't recommend using this unless you're very desperate or low on money. There are better and stronger materials you can use to make your base such as eva foam or thick insulation foam. I just don't know where to buy eva foam around where i live :')
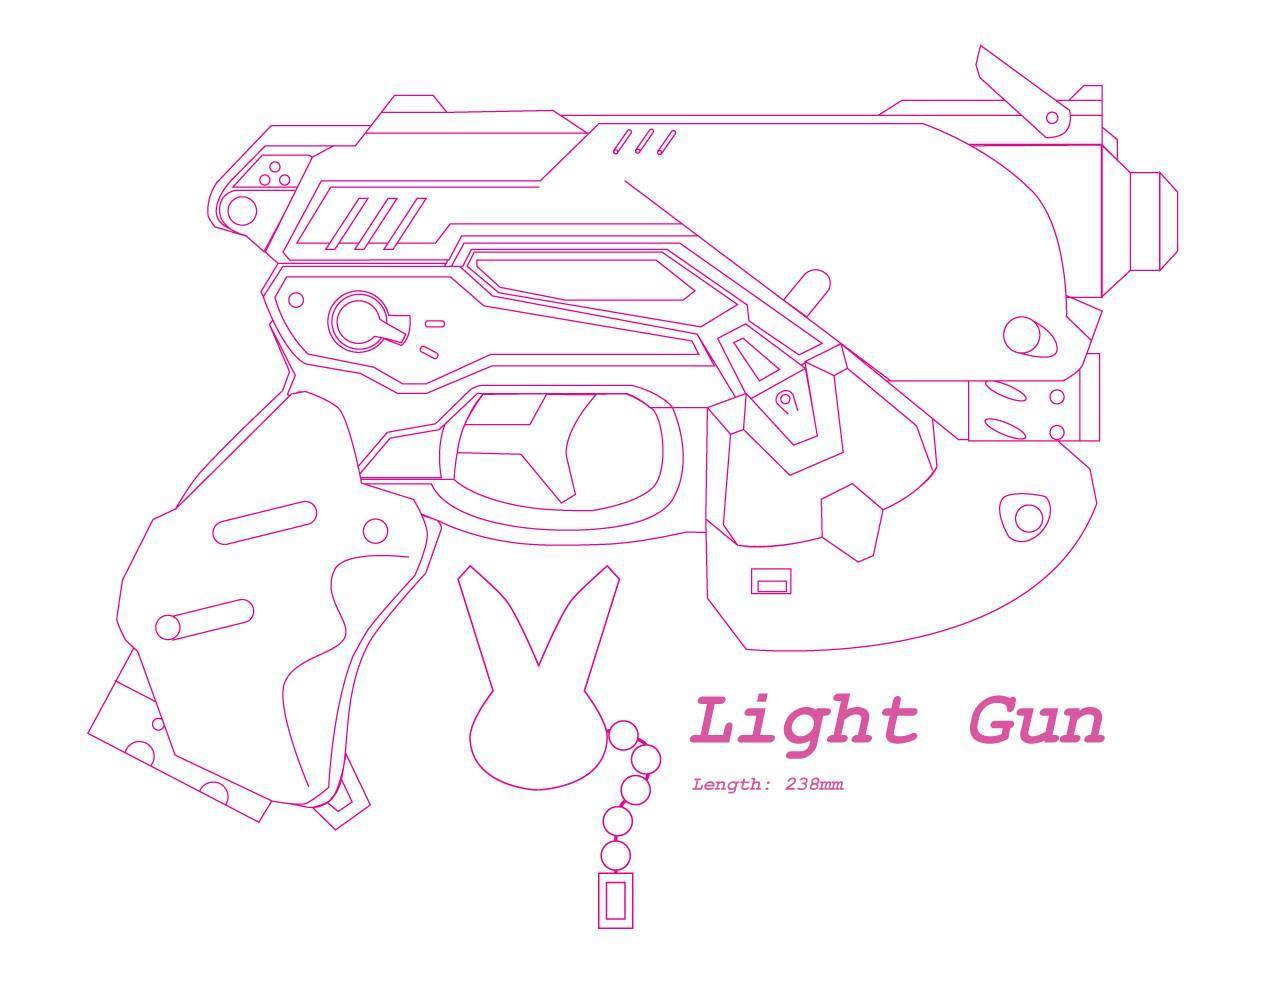
I used this blueprint that i found online, i believe it's from Gateway Props! Credits to the original artist/maker of this blueprint! Thank you for making this! ^^
I used this blueprint that i found online, i believe it's from Gateway Props! Credits to the original artist/maker of this blueprint! Thank you for making this! ^^

Base gun start!
So first i printed the pattern out, i was very lucky and it fit perfectly the first time i cut it out, but just keep printing until it's comfortable.

I then cut out the pieces accordingly. These three patterns will be the main pieces of the gun. The idea of cutting the pattern into three pieces came from Kamuicosplay on Youtube. Refer to pictures below so you know where to cut!

Like that! Also, i ended up making this mistake so i'll tell you now, so you don't make the same mistake.. ><
You see the little notch sticking out at the bottom right of the handheld part? That's where the bunny charm goes so cut that part of the paper away!

I traced the patterns onto my foam board in different thicknesses. I tried to use a box cutter to cut the pieces out, but it just ripped the paper part on top. I then got mad and started using scissors which worked, but left ugly edges around the shape and wrinkled the paper parts. I recommend you use an Xacto knife, because it's sharper and will make your life so much easier. I didn't have one so i had to resort to other sharp objects LOL

This is what it looked like! I made the handheld part two layers thinner than the other two parts because my hands are small and it would be uncomfortable if i made it any thicker. Adjust to your liking though!


After gluing the three main pieces together, i cut off any pieces that stuck out and covered the exterior all in a strip of craft foam to cover the ugly sides of the gun. I don't have a picture of this but you can see it in the pictures that are coming up soon!

I highly recommend you have a reference photo pulled up!


For the two barrels, i just used my 2mm craft foam again. I used those receipt tubes as a base and if you don't have a receipt tube, anything small and circular/cylindrical should be good!
I just wrapped the foam around and cut off the excess and then taped the ends together. To make the cone thing at the top of the barrel, i cut out a circle and cut a hole in it's center. Then i cut off more of it and taped it to make a cone shape. If you don't understand, try looking up "make a paper cone". It's basically the same concept except you cut a hole in the center.
The second barrel is like a laser, i think it might be a laser?? I just used the same technique and wrapped it around a smaller object since the second barrel is a lot smaller than the first. I then just covered the top with a foam disk and put some of my neon fish-smelling green puffy paint on it. If you can find a neon green glow in the dark puffy paint, you're gonna be golden, you can also use LED's if you'd like. My local craft store unfortunately ran out of the just neon green omg

Next i worked on the back and front details across the top of the gun. I don't recommend you make your shapes exactly like mine because mine is a bit inaccurate. Just look at some reference photos and cut out whatever you think is right!
So for the back of the gun, i first cut out the shape of it and duct taped everything down. At that point i was kind of confused on what to do next. I wasn't sure if i wanted to take off all the duct tape and then just glue the two pieces together and call it a day, or make it look thicker by using little pieces of foam to cover the emptiness in between. As you can probably tell, i started using little pieces of foam to make it look thicker. To be honest, i'm very glad i did this, it looks a lot better. I don't think you should make this part thin, because it's a thick piece in the reference photos.

After gluing all the pieces down, i filled in some gaps by using some glue and smearing it in the cracks of the foam pieces. I also did this to other pieces on my gun that had holes or just didn't look very clean.
After that, i made one large screw by cutting out a circular piece of craft foam and then made the smaller screws by using a pen to indent holes into the foam.

Next to the front part! This is super inaccurate, i couldn't tell what the shape was in the many reference photos that i looked at, so i kinda just assumed the shape..
I'm hoping no one can tell but there might be that one die hard overwatch/dva fan that calls me out on it LMAO coughs back to work
I only took a picture of two of the pieces but i actually used three so it would be thicker. So three pieces of 2mm foam.

This is what it looks like! You can see here that i used some glue to cover up the cracks because the curve of the piece wasn't the exact same as the curve of the gun.
I also forgot to mention, but i attached the large barrel by making a big hole in my gun and then putting glue on the barrel and sticking it in. I also just glued the little barrel in between the two pieces as well.

Base gun+details are now complete! Time to work on the nitty gritty stuff!
Making the base gun and the top details were the hardest part at least for me, so congrats if you've reached this stage, it'll be smooth sailing from here!
Details start!

I started off with the trigger. I made it by tracing out the shape of the trigger of the blueprint i used. I cut out two pieces but three might've been easier to glue down.

Next the bunny charm and the pink parts of the gun!
I actually had to remake my bunny charm twice because of a reason i don't remember? I think it was because it looked weird because i duct taped it together.
So first, i painted it with my original pink paint that looked like a bubblegum pink in the bottle, but it ended up drying as a hot pink smh
I just repainted everything using some white paint mixed with the pink


I'm not even sure what this piece is called loll but i just cut it out according to the blueprint. I did have to adjust a few curves here and there so the pieces would fit together like a puzzle but its no big deal.

Here's the bunny charm. I just cut out two bunny shapes and then taped a chain in it and then glued everything together.

I also taped one end to a counter on the fireplace to let it dry.

I made these ear thingies out of one layer of craft foam and just painted both sides pink.
There are little screws in these and i just used a black pen and stabbed it and then colored in the hole a little bit with the pen. (The picture is before i stabbed it/added the screw)

I don't have a picture of this but i also made the grip on the handheld part from one layer of craft foam.
Now the base pieces are done, lets add more details :'))

I use my green puffy paint and add it where it belongs! I used two layers to get a more neon green color and a more 3d effect.


I had a bit of trouble painting dva's logo. I printed out the logo and cut away the inside so i had a stencil. THIS DID NOT HELP LMAO the paint just ended up bleeding through the paper so dont just splat on the paint and expect clean edges. I used a skewer to go around the edges of the stencil and then outlined it in black.

ALSO! I didn't take pictures for this either but i just cut out two shapes and painted on the HB50 with some silver paint and a skewer.
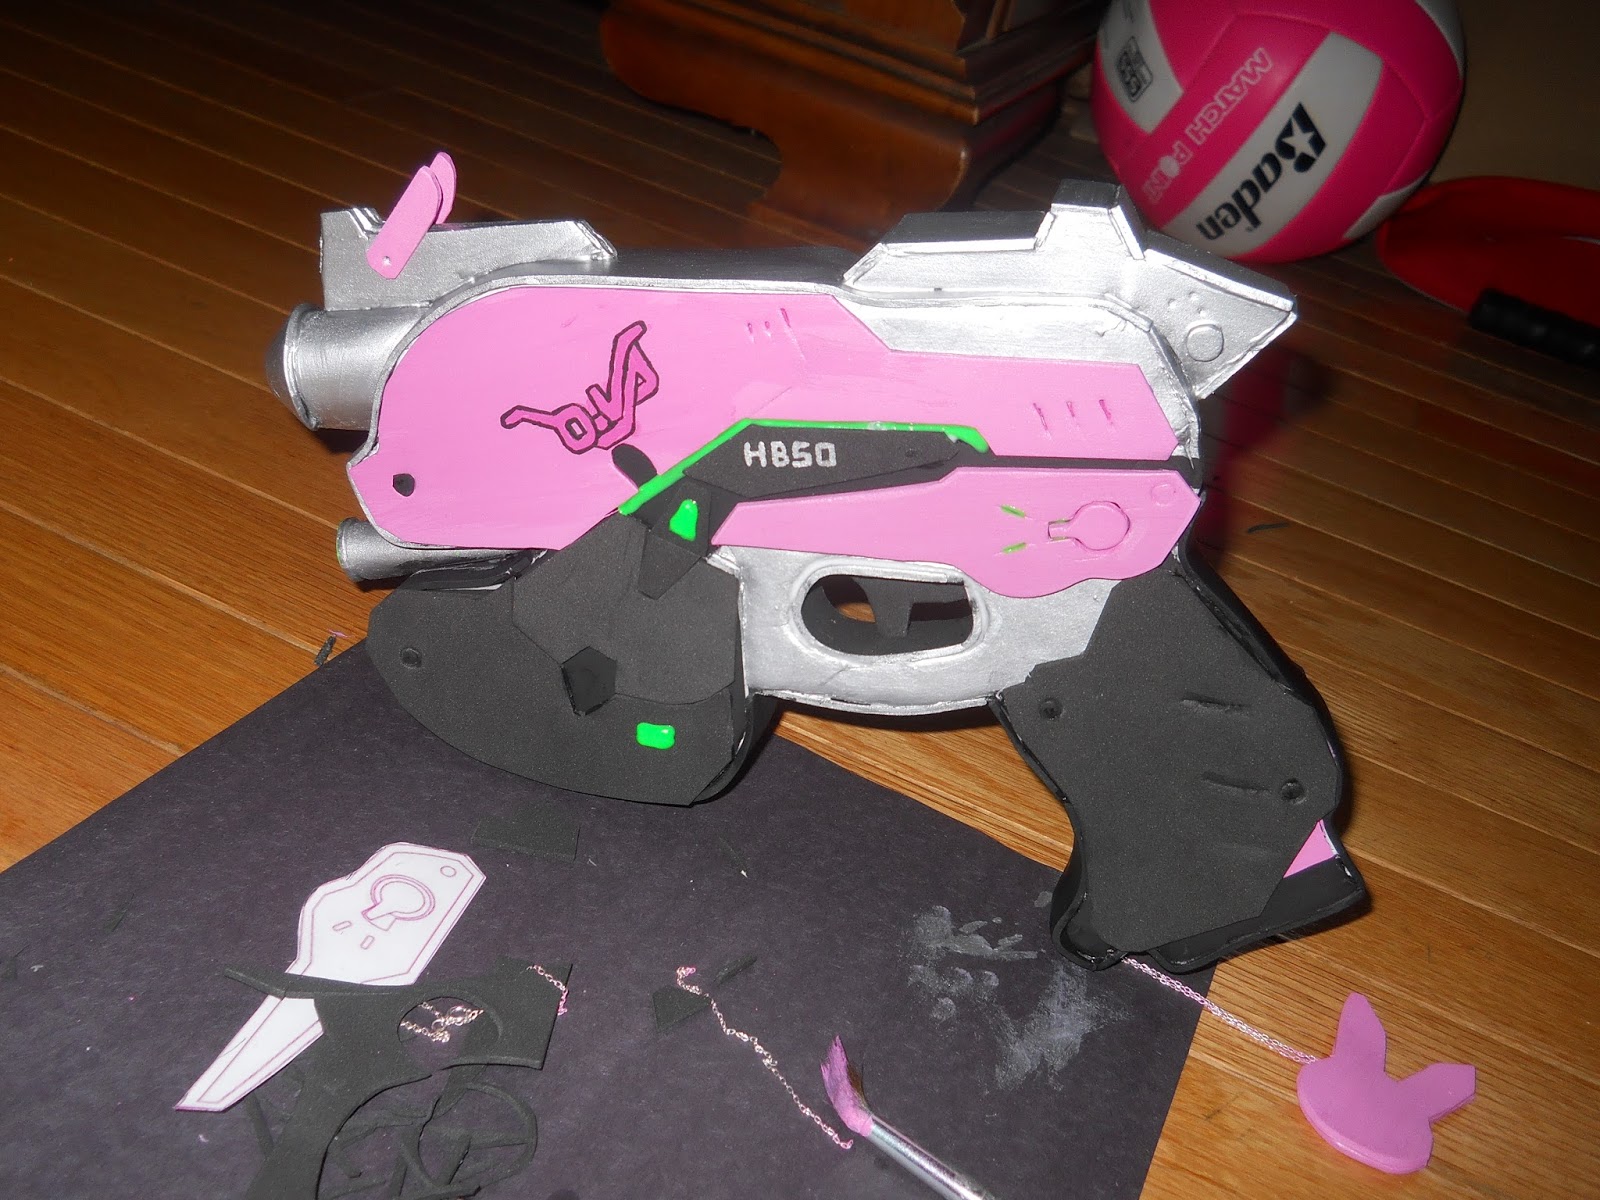
Painting/assembling start!
This was definitely the most annoying part, but also the part where everything started coming together!

I was slightly confused about where the colors were supposed to go, as different sellers/artists colored it differently. Some cosplayers made theirs all black, but i wanted a bit of silver in there because i thought it looked cooler that way lolll
One of the hardest parts was trying to prevent cracks. I highly recommend you prime your gun prior to painting because (I think??) it protects it from cracking. If you don't have a primer, that's fine! I didn't prime mine either, but you have to keep painting until the cracks go away.

I then painted the pink part near the handheld part. I only painted in a chunk of it because only some it is showing, and other parts are just covered by the foam grip so there is no need to waste paint. unless you really want to i guess

Ended up getting excited and taking a picture with the gun half done LOL it looks a lot bigger in the picture then it does in real life.. :')

I then painted the black parts and the rest of the silver parts, i'm not even sure why i painted half of the grip silver, it's supposed to be black :') I know i know it looks super ugly right now but just you wait.. ^^

So after all of the paint dried, i glued on the detail pieces, i forgot to put the grip and stuff. i adjusted any paint mistakes.
I also painted the strip of black across the bottom of the grip.


I just freehanded (?) squeezed the puffy paint out and adjusted with a skewer. I also added the little green details on the pink part by using a skewer as well.
For the screws, i used the cap of my puffy paint and squished it into the foam to make an indent. You can also use any small circular cap. I painted the screws with black and painted certain areas to add shadows and dimension.
Now you're pretty much done! Just add the pink ear pieces and add the bunny charm. I ended up duct taping it in a crevice of my gun and then painting over it and the surrounding area with black paint so it would be concealed. It actually concealed very well surprisingly!
NOW WE'RE OFFICIALLY DONE


You can see the duct tape inside of the big barrel sigh
i'll have to fix that later..

Here's me with the gun! Now you can be dva! If you still need to make the headset, check out my tutorial here!
If you need a good quality suit, i recommend ZentaiZone's great D.va suits! You can choose a set size or get it custom fit, and there are options such as removable gloves, adding soles, and crotch zippers ( WHICH IS A MUST NEED IF YOU ARE HUMAN AND HAVE FLUIDS)
Also. Sadly i broke the camera that i used to take these photos but i got a new better
quality expensive as hell camera that i'm excited to use! I have a ton of new reviews coming up and a review of my d.va suit and wig!
Bye bye!

For sponsors, PR, collaborations, please email me here!